How to Root Galaxy Note
I’m not responsible if something goes wrong on your phone(Usually nothing goes wrong), you’re doing this on your own responsibility. Rooting your phone will void your warranty so don’t root your device unless you know what you are doing.To know more about rooting check What is rooting and it’s top 10 benefits. All these methods WONT trigger the famous yellow triangle. 
Remember:
You always have to backup your device before proceeding in any of these methods.Luckily,you can check our article about How to Backup Every Android Device
Method1:Rooting via installing an application:
This method is very easy and simple but not recommended because you will have to patch the exploit (the bug) that allowed you to root which Might make your camera stop working but it will also work again after you unpatch the exploit.Also, this will change your phone status to modified. So, only do this if you are sure that you want to root your device easily.
d
Step2: After you have finished downloading the app. Install it by going to the directory you download it to, then click on it. If you got this error message 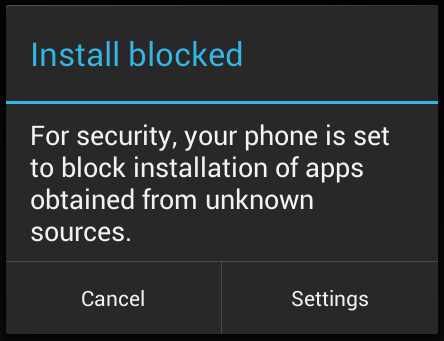

then Go to Setting-> Security-> Tick “Unknown Sources”
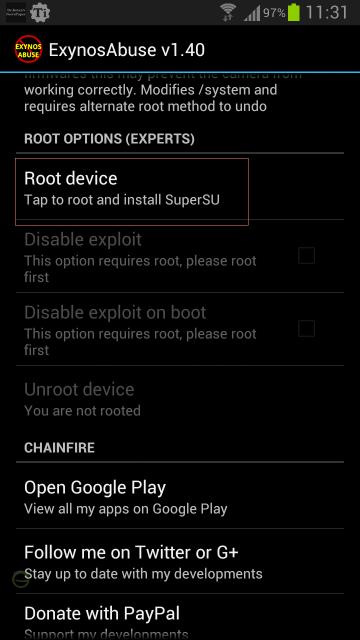
Step3:Now open the app and click “Root device”. As shown.
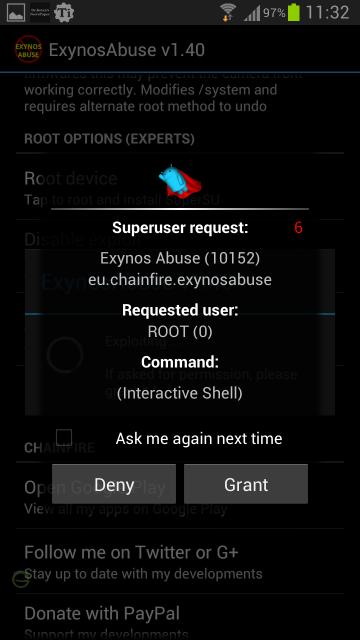
Step4:Now you will get this screen so click “Grant”.
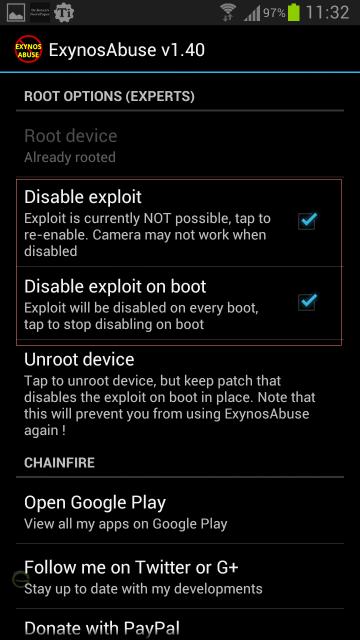
Step5: Now your device is rooted but,for Security reasons you have to tick “Disable Exploit” &“Disable Exploit on boot”. IF you had any issues with the camera then untick these options.
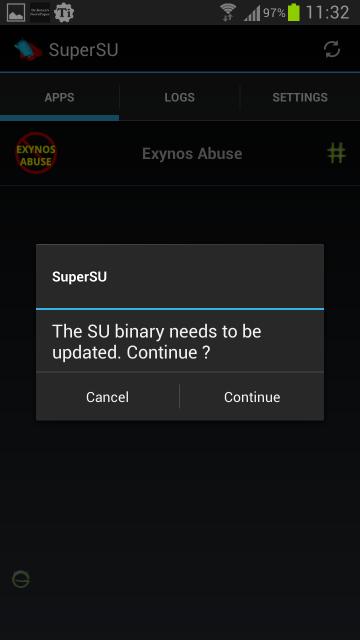
Step6: Now close this app and go to you app drawer where you will find a new app called SuperSu,click on it and when it opens it
will ask you to update the binary so tab on “Continue”.
Hooray You’re ROOTED
OR
Method2:
Rooting with Stock Recovery+Safe Kernal +
CWM Recovery: [recommended]
CWM Recovery: [recommended]
Requirements:
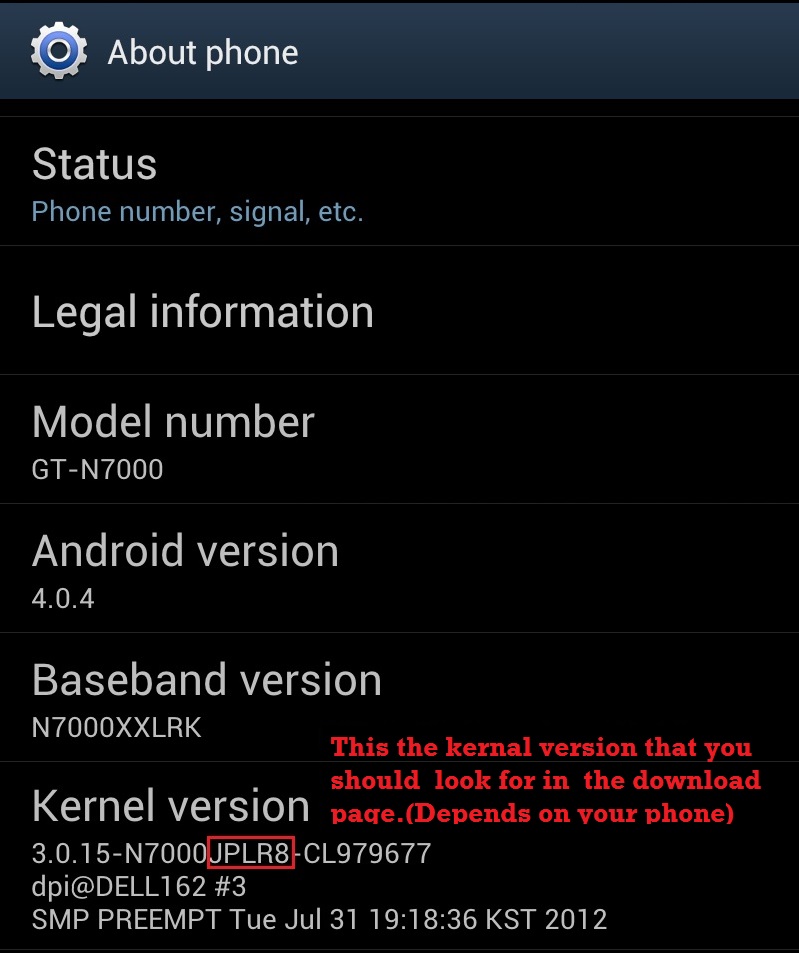
1- You will need to download the kernel based on your rom from HERE (Download the .zip file only). You will find the kernel version in the “Setting-> About phone”. Like in the picture. If you found problems to find your kernel don’t hesitate to ask.
Let’s Start:
Step1:Copy the .zip file to your External SD card
Step2: Now shutdown your galaxy note completely.Then, boot into recovery mode by holding the volume up+ the home button, Now press the power button ONLY for 5 seconds.(Keep pressing the Volume up +Home button after you see your phone model screen)
Step3:After then you will see the recovery menu,Now choose “install update from External SD”. And choose the .zip file we
downloaded earlier .
Step4:Then choose yes. Now your phone will install the root. After your phone reboots you should see SuperSu app in your app
drawer.
Hooray You’re ROOTED
NOTE:This method will root your phone + install CWM recovery but if you wanted to only root then follow method 3.
OR
Method3:Rooting with Stock Recovery:
NOTE: This method could brick your phone if you wipe your datafactory reset. So,
make sure you don’t wipe data factory reset. Or root using method 2.
Requirements:
1- Download these files:
Let’s Start:
Step1:Copy both files to your External SD card
Step2: Now shutdown your Galaxy Note completely.Then, boot into recovery mode by holding the volume up+ the home button, Now press the power button ONLY for 5 seconds.(Keep pressing the Volume up +Home button after you see your phone start.)
Step3:After then you will see the recovery menu, Now choose “install update from External SD”. And choose the “Root_SuperSU.0.95-FreeSpace.zip” file we downloaded earlier .And choose yes.
Step4:Now go back to the main recovery menu,Aslo Choose “Install update from External SD” And choose the “Root_Busybox_1.20.2.zip” file we downloaded earlier. After your phone reboots you should see SuperSu app in your app drawer.
Hooray You’re ROOTED


No comments:
Post a Comment